Import data from other tools
Airtable
6 min read

Importing data from other tools
We’ve already talked about building a base from scratch, but what if you already have data set up in another tool? It’s easy to bring in your most important information into Airtable and pick up right where you left off.
In this guide, we’ll take you through importing your data directly from spreadsheets or task managers into Airtable. Using the workflow map you created, we’ll help you import the crucial data for every step of your process.
Switching from other tools
Migrating your data to Airtable unlocks new ways to create important connections in your workflow, and uncover insights that you might not have been able to identify with your previous tools.
By having all your data in one central location, you can more easily form connections between your task manager, contacts database, and spreadsheet than if they all existed in separate tools.
Here are some common tools you may want to migrate data from:
Excel, Google Sheets, Smartsheet, Apple Numbers, CSV files | Asana, Trello, Monday.com, Wrike | Calendars, Contacts, Microsoft Access |
|---|
Airtable can wrangle almost any type of data, be set up to manage any type of project, and adapt as needed when your requirements change.
Pro tip
If you’re looking to set up a live connection to an external tool or another base, use Airtable Sync instead of importing your data. This brings information from another source into a new table by directly connecting your base account. Learn more about sync options here.
To bring your outside data into Airtable, follow along with these three steps as we go:
1. Identify your existing data sources
First, make a list of all of the existing data sources related to your workflow.
Go back to the workflow map you created, and for each step of your process, identify where the information lives. Determine which sources store the information you need for that part of your workflow.
If you’re not sure, or don’t have direct access, reach out to people in your organization who might know—and remember, you can always import more data later.
Pro tip
Before you bring your data into Airtable, make sure you’re set up to make the import process as easy as possible.
As a best practice, review your data before you bring it into Airtable. Take a moment to clean up your tabs, create consistent columns, and add a header row to your CSV file. Learn how to prepare your data for import here.
2. Choose your import method
There are a few ways to bring in your data, depending on your tool:
- Upload a CSV
- Copy and paste
- Import from an external source
- Use import apps
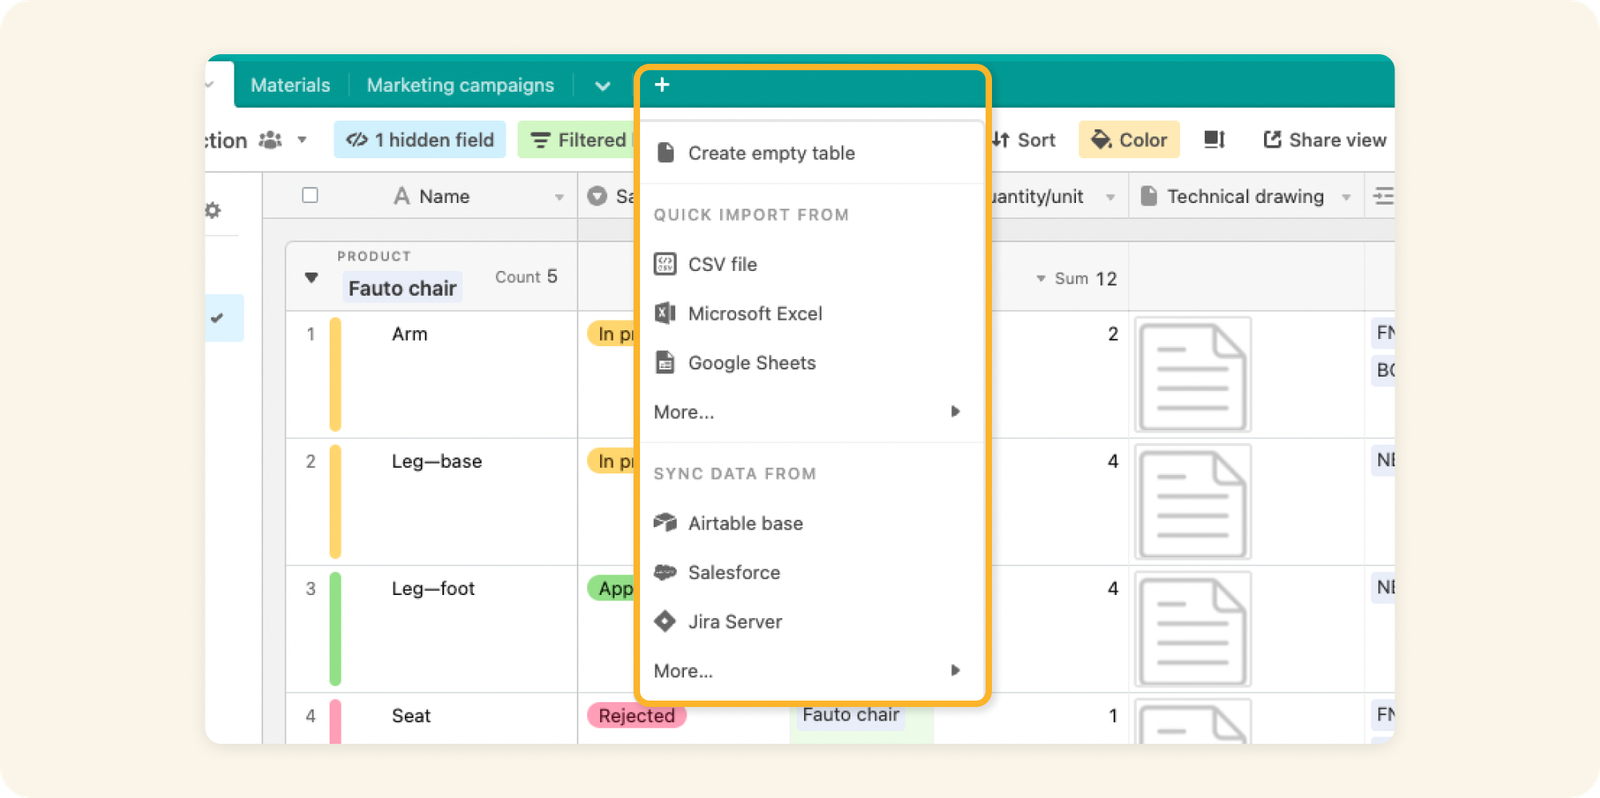
Method 1: Upload a CSV
The CSV (comma-separated values) format is one of the most common ways to move data between sites, applications, and tools, and is one of the few truly widespread and platform-neutral file types. Most spreadsheets and task managers will have the ability to export your data as a CSV—and Airtable can easily import it.
Method 2: Copy and paste
If you don’t want to bring in your entire database, you can also copy and paste directly from a spreadsheet. This is best suited to a simple table of data from tools like Excel or Google Sheets. You’ll have the opportunity to preview and customize your new table’s field types during the process.
Method 3: Import from an external source
Connect Airtable to existing static sources to automatically import your data, without the need to export to CSV first. Airtable allows you to connect and import directly from Google Sheets, Excel, Apple Numbers, Microsoft Access, Asana, and Trello.
Pro tip
Airtable Sync integrations allow you to import data from live applications that generate useful data (like Salesforce, Google Calendars, or Jira to name a few)in a way that automatically refreshes. The number of these integrations you can have, and the frequency with which they update, will depend on your plan.
Method 4: Use import apps
Specialized import apps are good for adding records into existing tables, rather than importing them into a fresh new table.
The apps live in the Apps marketplace, a home for optional add-ons made by both Airtable and third-party developers and users. Examples of import apps that you can find are:
- CSV import app, which allows you to drag-and-drop CSV files to add them to an existing table
- Contact import app, which lets you import contact information from vCard files
- Calendar import app, which pulls in dates and information from an ICS file
- XML import app, which converts an XML file from an RSS or Atom feed into your Airtable base
Get step-by-step directions on bulk import or update apps here.
Pro tip
Which import method is right for you? If you’re building out a base for the first time, we recommend using more lightweight methods like uploading a CSV or copy and pasting.
For more established workflows, expand your import approach with connecting external tools or using apps. Learn more about importing and adding data in Airtable here.
3. Organize your data after import
With your data now in Airtable, now it’s time to configure it to your needs, and make sure it all goes to the right place.
CSV files, and other similar formats, reduce all data to a single, simple text field type. To get the most out of your Airtable base and workflow, we suggest converting these fields into a more useful type, depending on what you need them to do.
Airtable includes more than 25 different field types, and you can learn about them here. Feel free to experiment, you can always switch field types later to try out different options.
For example:
Numbers | Number |
|---|---|
Defined Options | Single select |
List of tags | Multiple-select |
Long paragraphs of text | Rich text field |
Links | URL or button field |
The same details as another table | Linked record |
Pro tip
Once your data is migrated and fields are set up, see your data in new ways using views. Read more on setting up views for your workflow here.
Congratulations! You’ve successfully imported data from an outside source into Airtable. With your base ready and up to date, you’re set to get started with your workflow. Remember, you can import additional data at any point in time into your existing base, not just when you’re getting started.
Next up, we’ll walk you through some common design tips to make your base as efficient and easy to use as possible.

