6 common Airtable design decisions

Airtable
6 min read

6 common Airtable design decisions
You’ve built your base, filled it with data, and established your workflow—so what comes next? It's time to future proof your base’s structure, so that it scales with you and your team.
In this article, we’ll go over some best practices for building a base that can change over time as your needs evolve, and as more people engage with your system.
1. Keep everything for one workflow in one base
All of the information needed in a single workflow should be stored in a single base, so that the relationships between all the data can be easily managed.
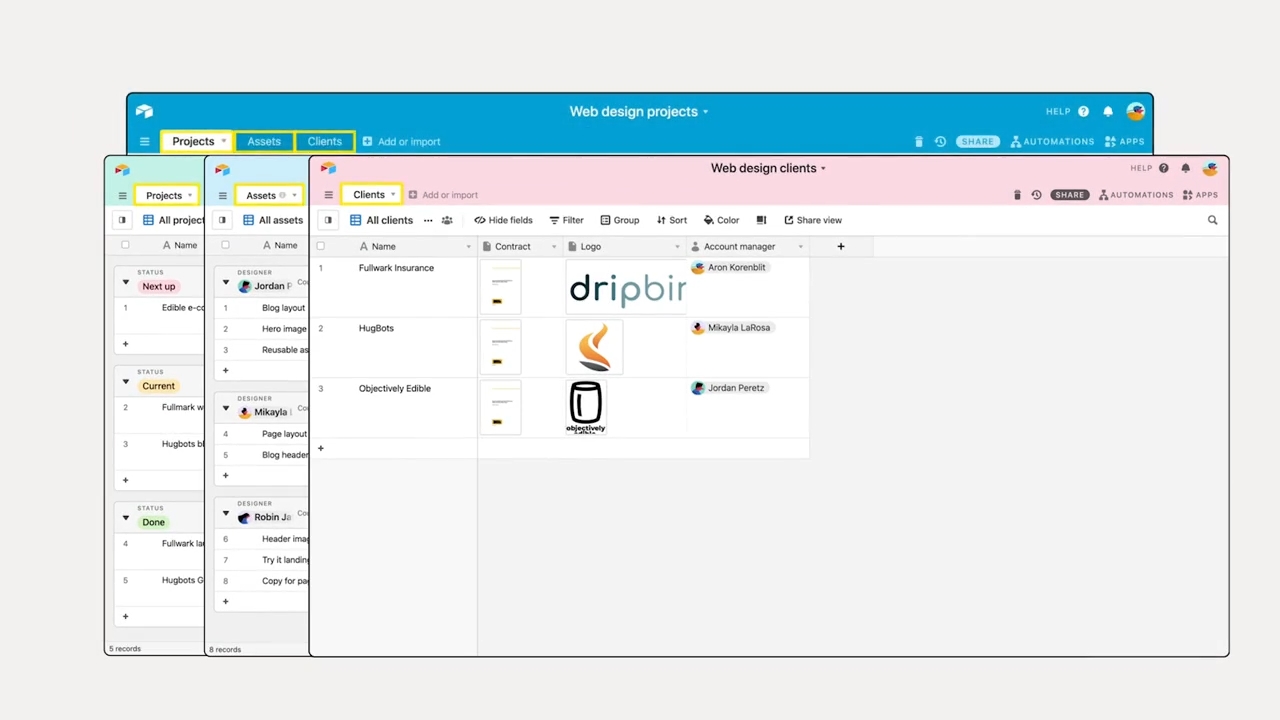
For instance, a web design agency’s complex asset management creation process could be considered its own workflow. However, since the assets they’re creating are tied directly to their projects and clients, it’s best that all information around projects, clients, and assets be organized in one base.
However, if you do have important information in another base, or even on an outside website or tool, you can use syncing to ensure that data can be accurately incorporated into your workflow.
Take action: Do you find yourself navigating to multiple bases for just one workflow?
Consolidate them into one by importing new tables or fields to create a single source of truth.
Alternatively, use Airtable Sync to automatically bring in the information from another base and create a single source of truth. Learn how to set up a sync in three steps here.
2. Reduce redundant tables with new views
In Airtable, each table in your base should represent a distinct list needed for your workflow—for instance: clients, assets, and projects.
Instead of creating multiple tables for similar sets of information (like separate tables to track clients in two different regions), you can use multiple views within a single table. This keeps all of your information consolidated while also making relationships easier to create.
Take action: Do two or more tables in your base have matching fields tracking similar information? Centralize those into one table with multiple views that can show you the information you need.
3. Streamline your workflow with linked records
As you build out your base, you may want to track similar information in multiple places—which you can easily do, using linked records.
Let’s say when building your base, you decide each record in your “Project” table needs a field for the associated client. If you use a single select field, you can note the client’s name—but you can’t quickly see the info you have stored in your “Client” table, such as your point person, the company’s address, or any other information.
By turning that field into a linked record to your “Client” table, you can now see (or hide) all of the information about that client from the project—and associated projects will now show up in the “Client” table as well.
The best part? You only need to manage those details in one place, and any updates will automatically be reflected across any linked records. No more cross-referencing to make sure you’ve got the latest information.
Take action: Are there additional dimensions of your workflow that you’d like to track from a single field? If so, turn that field into a linked record and add any additional fields you’d like to track in your new table.
4. Reduce manual input with formulas
Some information in your workflow needs to be entered manually: for example, you might manually enter agreed upon start and end dates for projects, assigned collaborators for assets, or uploaded client contracts.
If you find yourself frequently entering information based on data that’s already in your table, you may be able to save yourself some effort by calculating that information automatically using formulas.
In Airtable, you can use the formula field type to determine values that derive from other fields. For example, if your review date is always a week before the submission date, use formulas to establish that automatically.
Formula fields can be used in many ways to reduce manual inputs and ensure information consistency—here are some common ways to use formulas:
Multiply, divide, add, subtract. Perform mathematical operations such as calculating budget overhead as a percentage of the budget.
Calculate key dates. Use the DATEADD function to automatically enter crucial dates that depend on other dates—say a review date that is always a week before the submission date.
Combine text together. Concatenate two or more existing values for the primary field in your table.
You can do much much more than this, and we’ll cover formulas in more detail in a later guide.
Take action: Could any of your fields derive from other fields? Use the formula field to determine them automatically, which saves you the need to enter redundant information and ensures information consistency.
5. Optimize your primary field
Think of the primary field (the left-most field in your table) as holding the name of each record in a table. This name should be informative, unique, and short, so even if all other fields are hidden, it’s clear what each record represents.
If your primary field isn’t unique or representative, it can be difficult to understand and differentiate your records. This is why you’re limited to a certain number of field types for this field—unique and discrete types of data like email addresses, asset IDs, or even phone numbers are good candidates.
For instance, say your primary field captures only the first name of a list of contacts. If any contacts have the same first name, it becomes impossible to quickly identify which record refers to which contact. Instead, try combining first and last names together for a truly unique primary field (and for extra credit, use a formula to automatically generate one for you!).
Take action: Are your primary fields easy to understand?Take a moment to ensure that all primary fields in your tables are short, unique, clear representations of what’s in the record.
6. Look up key details across tables
An efficient workflow relies on consistent and up-to-date information—and you can take a big step in this direction by leveraging the lookup field.
Lookups pull information from one table into another via linked records, reducing the number of places you have to update the same piece of information, and ensuring they match perfectly.
For example, if a project’s due date changes, ideally you should only have to make that change once. With a lookup field, you can easily see the project due date associated with an asset in a different table. Any changes to the project’s due date would be reflected across all assets tied to that project.
Take action: Updating the same information in multiple places? Replace redundant fields with a lookup field to keep information consistent and up to date.
Following these steps will ensure that your base is efficient, easy to use, will keep itself up to date as much as possible, and will grow with your team’s needs. And now that you’ve built and optimized your workflow, it’s time to start collaborating!
About the author
Airtableis the AI-native platform that is the easiest way for teams to build trusted AI apps to accelerate business operations and deploy embedded AI agents at enterprise scale. Across every industry, leading enterprises trust Airtable to power workflows and transform their most critical business processes in product operations, marketing operations, and more – all with the power of AI built-in. More than 500,000 organizations, including 80% of the Fortune 100, rely on Airtable's AI-native platform to accelerate work, automate complex workflows, and turn the power of AI into measurable business impact.
Filed Under
Build your workflow