Bring your workflow into Airtable
Airtable
8 min read
Written by
Airtable
Filed Under
Build your workflow
TOPICS
Bring your workflow into Airtable
Workflows are built on top of information—in some cases, mountains of it!
With Airtable, you can organize that data to best suit your needs. And now that you’ve done the work of mapping your workflow, you can optimize your Airtable base to match.
In this step, we’re going to take the workflow you’ve created, and start making it quicker, easier, and more reliable with Airtable. With your workflow map as your guide, set up (or update!) your base’s tables, fields, linked records, and views.
1. Organize your workflow’s structure
To create your workflow map, you outlined the information required across each step and organized that information into groups. It’s now time to translate that work into Airtable—where each group will become its own table.
Pro tip
If you have existing information that lives in spreadsheets or other data sources, you can import this data directly into your tables.
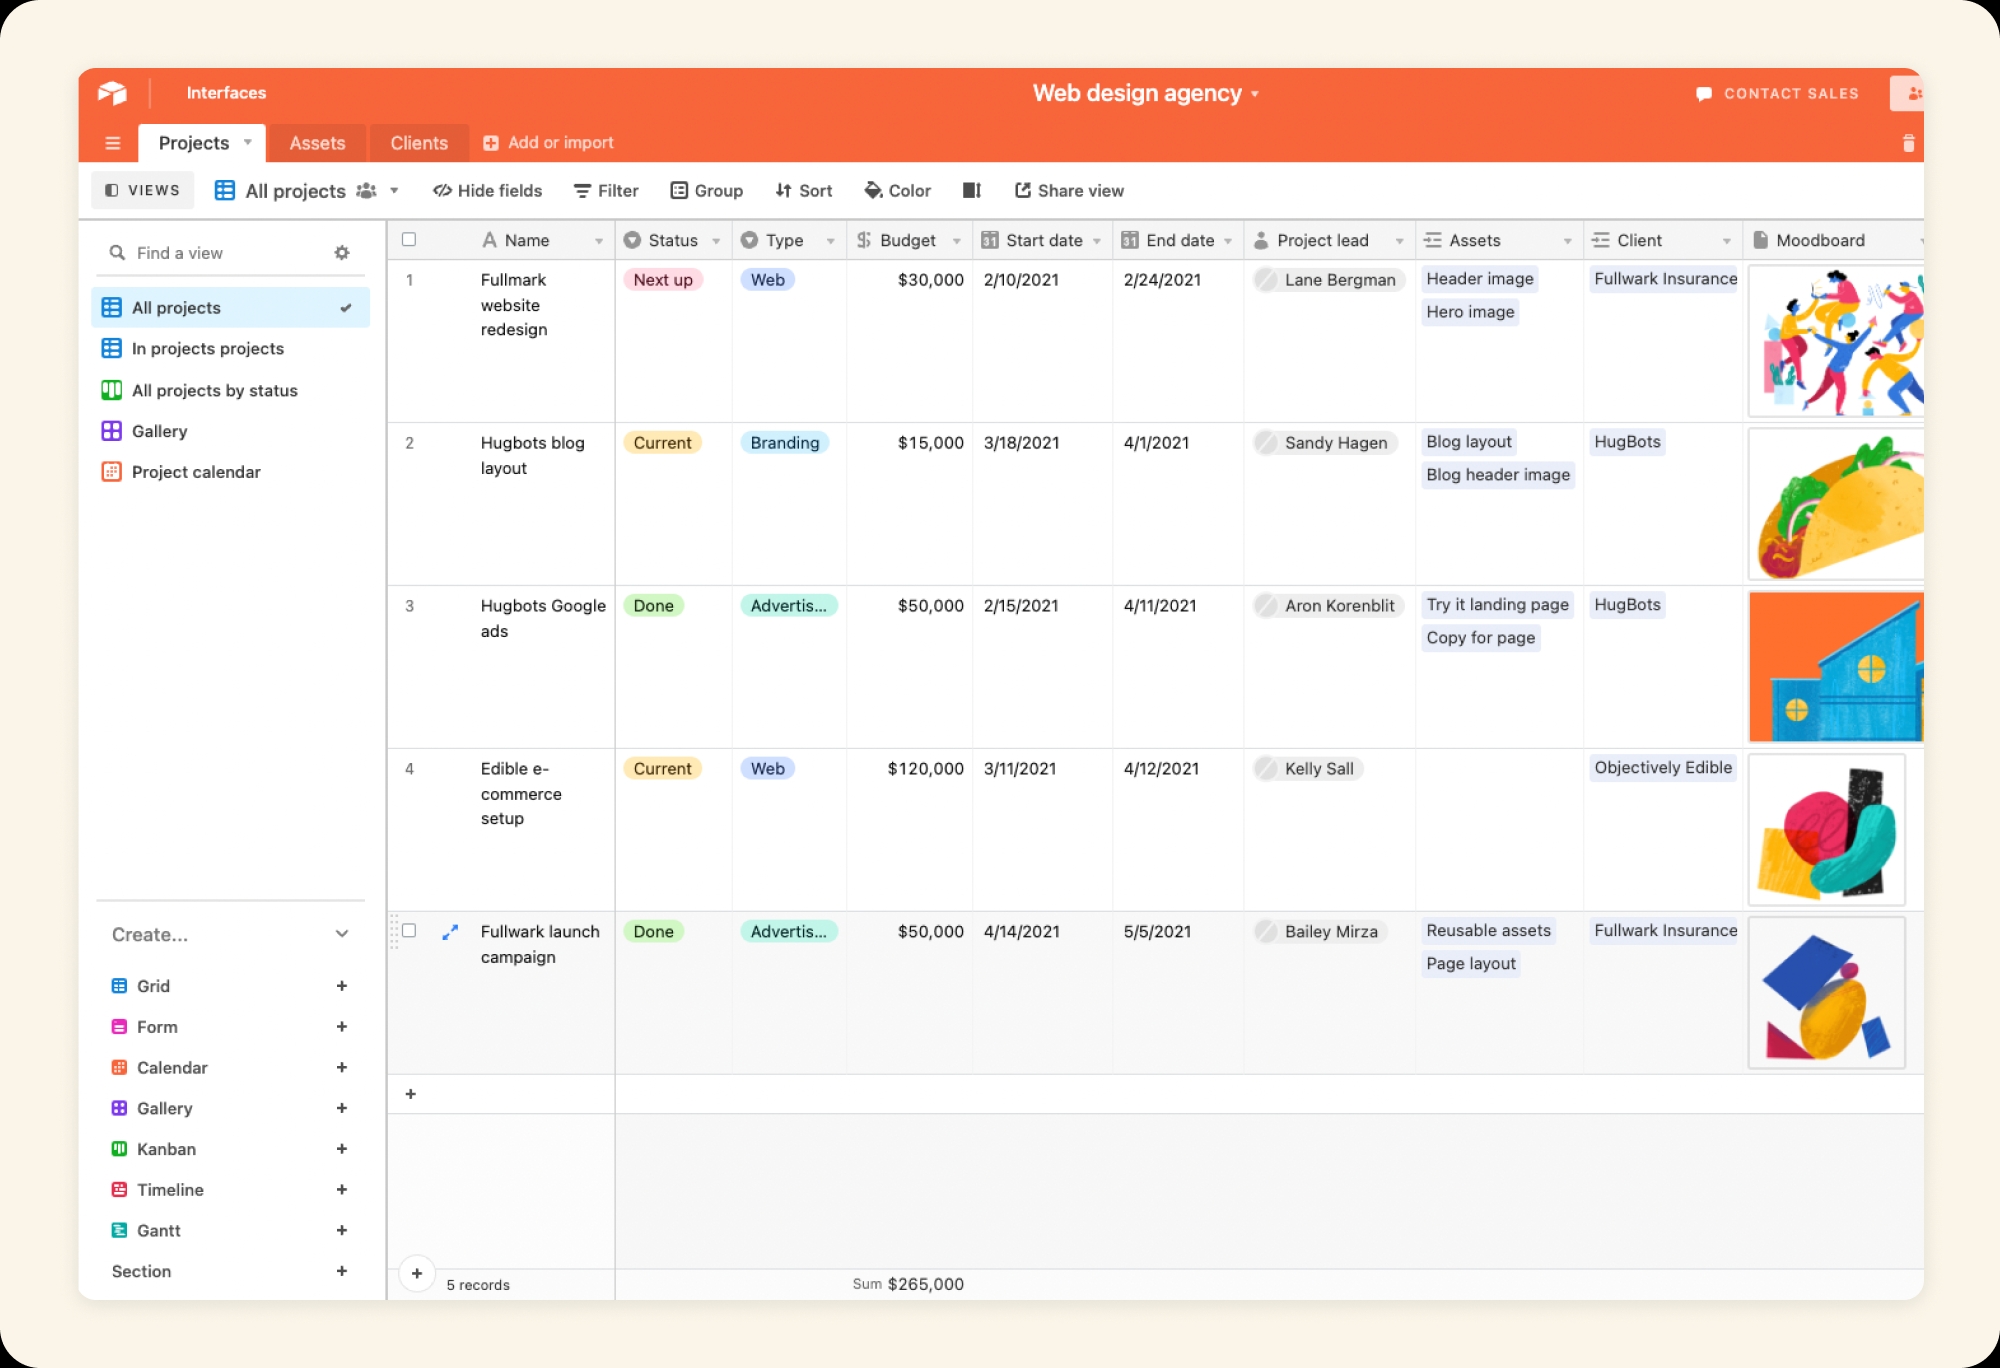
For example, our web agency would set up tables for projects, assets and clients:
Take action: Create new tables
Create a table for each key group of information that you established in your workflow map. Then, add records to every table to capture all of the items in each group.
2. Track your workflow's details
You’ve organized your tables to hold your key types of information. Now it’s time to add in the other important details your team needs.
Each piece of information that you listed under a particular group becomes a field for that table. If there’s a detail you need or an action you need to take, add it as a field.
Pro tip
Airtable includes over 25 different field types to choose from, such as multi-selects, checkboxes, URLs, emails, phone numbers, and formulas. Feel free to experiment with field types—if you find a field type that better matches your requirements, switching is easy!
For example, the web agency might apply these field types to their Project table like so:
The fields you add to your tables will depend on your specific workflow, but here are some field types that are commonly used across workflows:
Single select | Attachment |
|---|---|
Tag each record according to pre-selected categories, such as status, priority, or size. | Capture relevant documents, images or videos, such as contracts, proofs, and assets. |
Date | Collaborator |
|---|---|
Track important dates for each item in your list, such as project timelines, asset due dates, or contract start and end dates. | Assign ownership or communicate with the appropriate stakeholders you’ve identified in your workflow. |
Take action: Create new fields
Add fields to capture each piece of information in your workflow map. Add as many fields as you need—you can always add or remove fields later, as your needs change.
3. Connect your workflow together
While building these tables, you probably found that some fields and records will relate to each other across different tables. Airtable is built to handle exactly this type of relationship, so your new tool can be as dynamic as your workflow!
Linked records allow you to reference data across tables—without having to make updates in multiple places.
Pro tip
Linked records can eliminate redundancy, enforce data integrity, and enable new methods of automation—turning your list of records into a fully fledged relational database.
Linked records allow data to be entered once, and updated on multiple tables instantly, saving time and ensuring accuracy. They also give you access to some powerful field types—count, lookup, and rollup, which allow you to perform calculations and actions across tables.
For example, the web agency might want to associate each project to its respective clients. Instead of creating a new, manual “Clients” field in the Projects table, they can link directly to the Clients table:
Take action: Create linked records
Take a moment to understand your workflow’s relationships by reviewing the data in your tables and drawing connections. Which items are common across groups? Once you have identified important relationships for your workflow, you can add them into your base using the linked record field type.
4. Curate how you view your workflow
Different information will be relevant at different moments and for different people in your workflow. With views, you can build custom ways of looking at your data, to give each stakeholder quick access to the information they need.
For example, a project owner at the web agency could set up an “In progress” view that filters out completed projects and shows only the fields necessary to better prioritize design assets:
You can customize any view with several options: filter down to relevant records, hide unnecessary fields, sort to a preferred order, and group similar records together. You can also use different view types to create different visual ways to look at your data.
If you're tracking... | Use this view... |
|---|---|
All the details | Grid view |
Survey responses from your email newsletter | Form view |
Project status or team workload | Kanban view |
Upcoming due dates for the next 2 weeks or month | Calendar view |
Multiple overlapping parts of a major project over time | Timeline view |
Use these tools to create views for your team members so they can see the most important information for their roles—and to give them space to customize their interface to their own needs.
Our web agency could build a view for designers to show design assets due in the next two weeks:
Take action: Create new views
Create as many views as you need to support the different steps and stakeholders in your workflow.
Now you have a series of tables based around your workflow, all of which keep track of important factors for your work, and connect in key ways. Next, we’ll show you how to import data from other tools, to bring your existing information into Airtable.